
Launch Chat Widget
Use this guide to deploy the Octocom chat widget on your website. You’ll insert a script tag and configure domain settings in your Octocom dashboard.
On Shopify?
If the storefront is hosted by Shopify, skip the script tag and use the Shopify Chat Widget Tutorial — the app embed does the same job with no code.
Use this guide instead for a headless or custom storefront, even when Shopify powers the checkout or order data behind it. The Shopify theme editor has no effect on pages Shopify doesn't render. If you run both — a custom site plus a Shopify storefront — set up each one with its own method.
1. Add the Script Tag
To embed the chat widget, insert the following script tag into your website’s HTML:
<script src="https://www.octocom.ai/chatbot/bundle.js" async></script>You can include this:
- Directly in your website’s HTML (recommended), or
- Via a tag manager such as Google Tag Manager (GTM)
⚠️ Note: If the chat widget is added via Google Tag Manager, it may be blocked by browser ad blockers and not appear for some users. To ensure the widget loads reliably, we recommend adding the script directly into your website’s HTML.
🍪 Cookie consent: the widget sets no cookies and stores nothing in the visitor's browser until they open the chat, so it does not need to be gated behind a consent banner on the standard reading — you can safely load it directly. Details, the full storage breakdown, and a consent-gated loading recipe (if your legal team prefers it) are in Browser Storage & Consent.
2. Whitelist Your Domain
The widget will only appear on domains that you explicitly allow. You can whitelist domains either via the Octocom dashboard or by contacting your account manager.
Configure in Dashboard
-
Go to Octocom Dashboard
-
Navigate to:
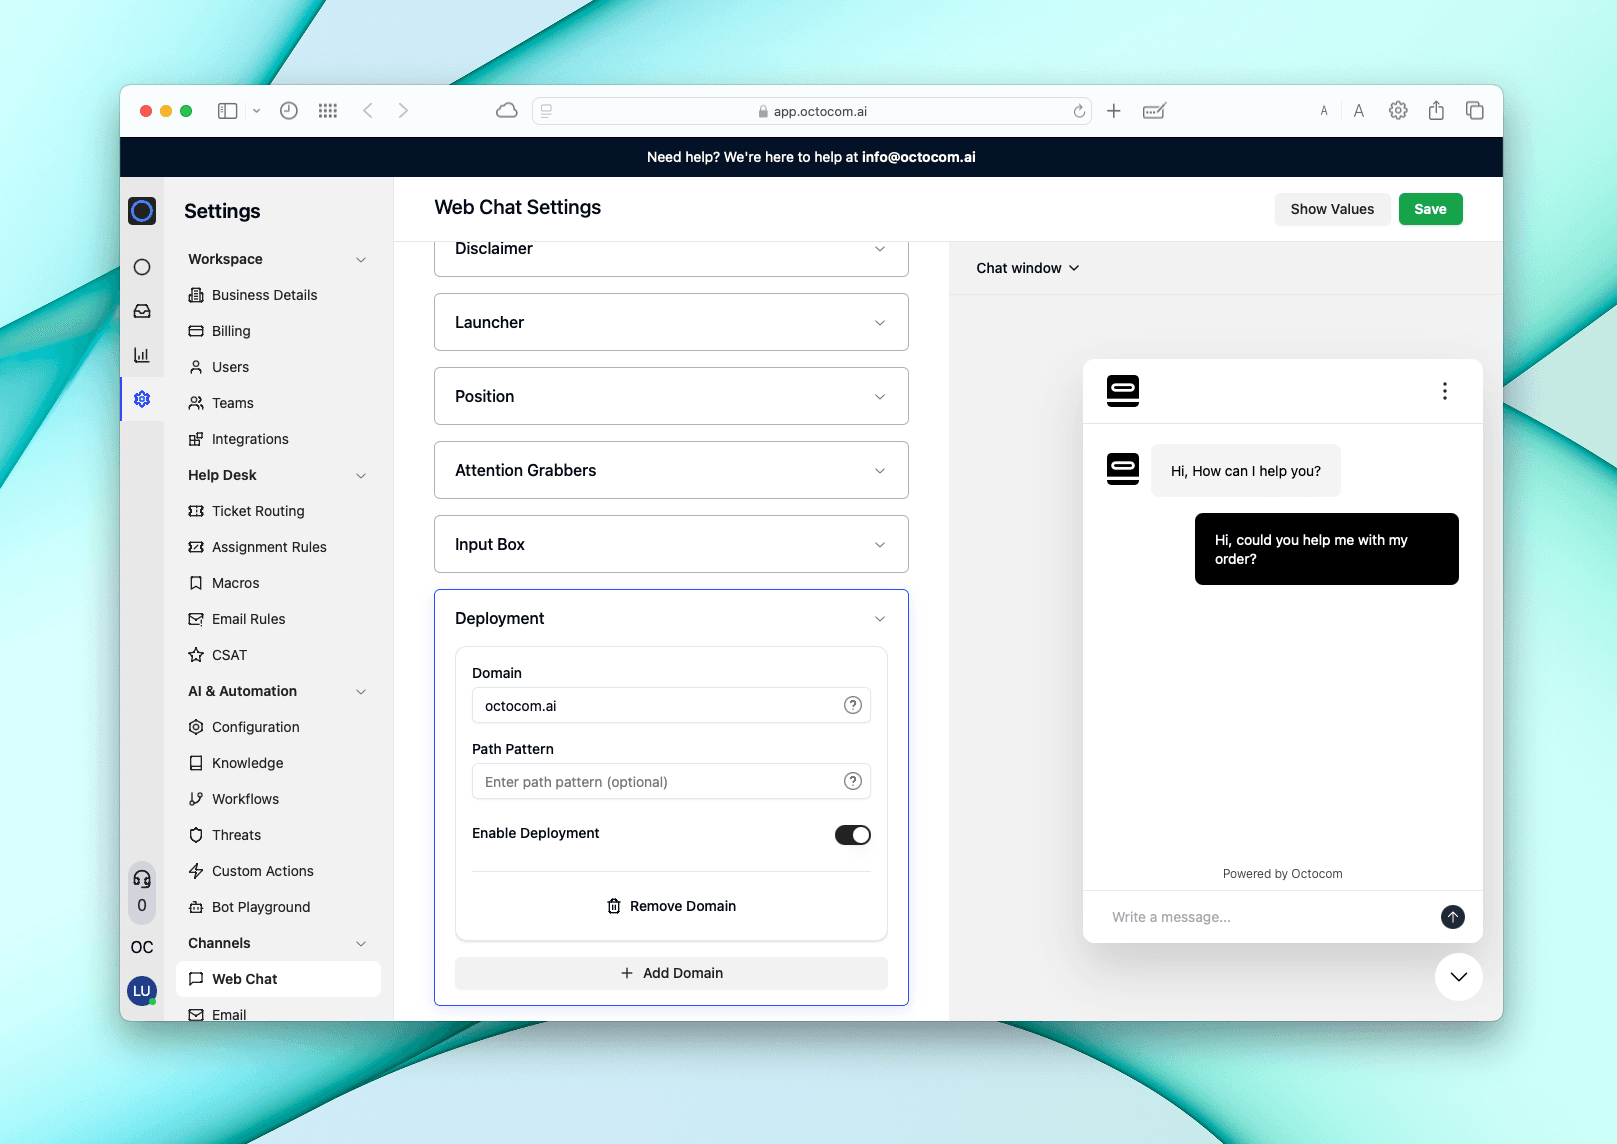
Settings → Channels → Web Chat → Deployment
-
In the Deployment tab:
- Add your domain (e.g., example.com)
- Enable deployment using the toggle
- Click Save
-
Once saved, the widget will become active for visitors on the specified domain.
🛠️ Tip: You can restrict deployment to specific pages (e.g., /faq, /contact) if needed.
Each hostname needs its own entry
Domains are matched by exact hostname, so every hostname you want the widget on has to be listed separately:
example.comandus.example.comare different hostnames — list both.www.example.comandexample.comare treated as the same, so you only need one of them.- Locale paths on one hostname (
example.com/us/,example.com/nl/) are all covered by that single entry.
3. Optional: Time-Based Activation
You can configure the chat widget to appear only during specific hours (e.g., business hours).
This feature is currently managed manually. To enable it:
- Contact your account manager to configure operating hours.